This website uses cookies so that we can provide you with the best user experience possible. Cookie information is stored in your browser and performs functions such as recognising you when you return to our website and helping our team to understand which sections of the website you find most interesting and useful.
A Brief introduction to the Conservation of Salisbury Cathedral Spire
Written by Philip Scorer Director Vitruvius Conservation
During my time as a member of the BLF, I have been involved in many discussions, some heated, about the merits, or not, of various types of lime. Sometimes the choice of which lime to use for a mortar is reasonably straightforward.
As a conservator I tend to use the rule that a mortar should have the following properties relative to the masonry unit it is applied to: better capillary action, lower density and higher flexibility. Mortar should be sacrificial to the masonry and function to protect it. So, knowing the substrate, the masonry type, the structure and the function that the mortar needs to perform, this should be relatively straightforward to specify. However, sometimes it can be a bit tricky.
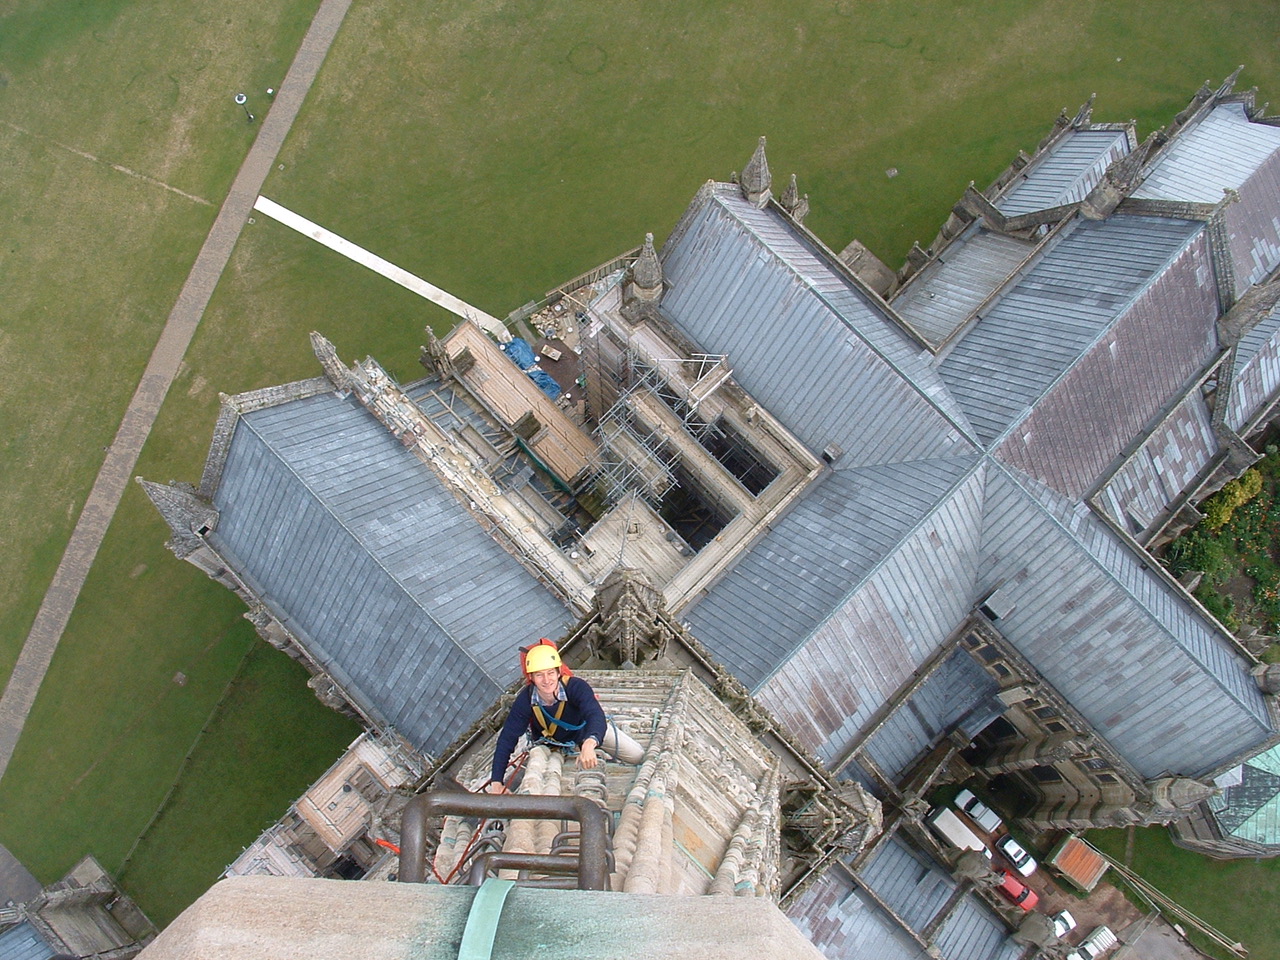
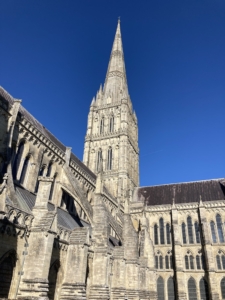
Of the various jobs I undertake, perhaps the most challenging is the conservation of Salisbury Cathedral spire. Since the scaffolding came down in the 1990s, the only way to inspect and repair the spire is by rope access. Over the last 20 years, my co-workers and I have carried out detailed defects reports to the spire followed by remedial works.
How we carry out the conservation of Salisbury Cathedral Spire
The first challenge is the commute which starts at the cathedral works yard; loaded with all our equipment, we climb the stairs to the nave roof, then up the tower to the base of the spire. There are then 10 wooden ladders inside the spire leading to ‘the weather door’, a small door some 50ft below the top of the spire. We exit to the outside and climb metal fixed rungs to the top. It is here at 404ft that one can truly appreciate the height of the spire. The entirety of Salisbury lies beneath you, the shadow extending beyond the bounds of the cathedral like some gigantic sun dial.
Although austere-looking from the ground, the spire is decorated with over 5,000 ball flowers, some carved with three lobes and a centre, many just a hemispherical protrusion on a rib; also blind tracery bands encircle the spire and enrich the clusters of pinnacles on each corner. Despite the extensive and excellently executed work carried out during the main restoration, the ravages of time continue to leave their mark on this remarkable structure.
The purpose of our visits is to carry out a detailed defects inspection followed by a programme of repair. We adhere to a hierarchy of defects to categorise and prioritise those that can be dealt with and those that require monitoring. Among the defects are the areas that are suffering from active erosion i.e. where the stone becomes soft enough that the weather erodes the surface detail away.
The decay process of Chilmark stone is, even in a sheltered location, slightly complicated. The fine- grained local stone is a carbonate-cemented sandstone (a sandy limestone or a limey sandstone depending on who defines it). This means it is subjected to more complex weathering than an easily definable limestone or sandstone.
A typical decay process of sandstone is contour scaling of the surface (onion skin weathering) often attributed to an inhibited surface pore structure, a subsurface layer weakened by thermal expansion and soluble salt deposition causing the surface to ‘buckle’ and fall away. Whereas typical limestone is frequently affected by soluble carbon dioxide and sulphates from the atmosphere dissolving the calcium carbonate matrix and converting it to the more soluble and mobile calcium sulphate. These are deposited on the evaporative surface forming a crust, which blisters and falls away exposing the weakened interior. It is, when affected, the worst of both worlds. In short, the common issue is a hard surface layer with a disaggregated soft interior. Add to this the fact that the affected stone is hundreds of feet up a spire on one of eight elevations each exposed to differing weather, and this makes for a complex picture.
Perhaps counterintuitively, we have found that the exposed South-facing elevations are generally in better condition that the more sheltered North-facing elevations.
Mortar Repairs
A common defect that we find is where the hardened surface has blistered and fallen away; this exposes a soft and vulnerable interior and makes the remaining surface detail vulnerable to being undercut and lost. These are the defects where mortar repairs are most applicable. So, how do we apply the tenets of softer and more permeable to this situation?
The skin of the stone is relatively hard and impermeable and the interior is very soft and extremely porous. The ‘normal’ method for mortar repairs is to remove decayed stone until a sound layer is found before applying the mortar repair but in many instances, this process would hollow out the feature. Added to this, the pressures of budget, time and exposure to the elements makes it a real conundrum.
The regular, detailed inspections and works we have carried out over the last 20 years have been an excellent opportunity to see how the decay of the stone continues and how the mortars that have been applied behave. The mortar needs to perform its function of protecting the exposed soft interior and allowing moisture to be transported away from it preferentially to the surrounding stone surface. In addition, the mortar needs to be applied and tended in a short time-frame with minimal shrinkage and protection.
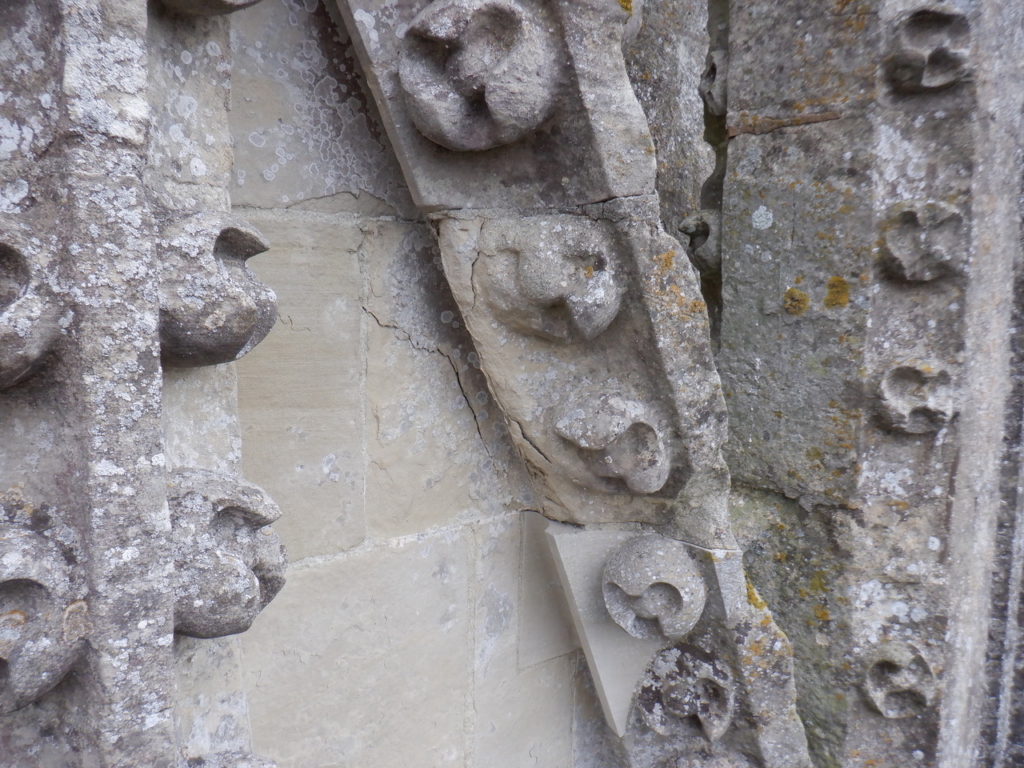
Stone decay
When we first visited, the specified lime for repairs to weathering surfaces at this height and exposure was NHL 5. As years passed and concerns of hardness increased, the specification reduced by degrees to NHL 3.5 and NHL 2 (we are now aware of the variations and unpredictability of brands and batches!). Currently, it is a 50%:50% or 25%:75% blend of NHL 2 and quick lime (3 lime:1 repair aggregate blend) depending on the level of exposure and hardness of the stone. We have found that the hot mixed lime gauged with NHL gives a workable, malleable mortar with minimal shrinkage. It must be noted that we had tried putty /Trass repairs in the past but we found them to be too ‘sacrificial’ even in very sheltered areas, making it impractical for use.
What we have observed is interesting. Many of the earliest NHL 5 and 3.5 repairs have remained as a protective layer but have also started to erode in preference to the surrounding stone. The edges of the repair have receded, the aggregates have become more exposed and lichen has colonised the surface. These examples are normally in the more exposed elevations and have performed well for over 15 years. However, there are some instances where the stone has continued to decay while leaving the repair unaffected. These are mostly found in sheltered areas on larger repairs. Mortar re- pairs have been applied to the most decayed masonry, meaning that they are by their nature more vulnerable so the preferential decay may or may not be a symptom of the hardness of the mortar.
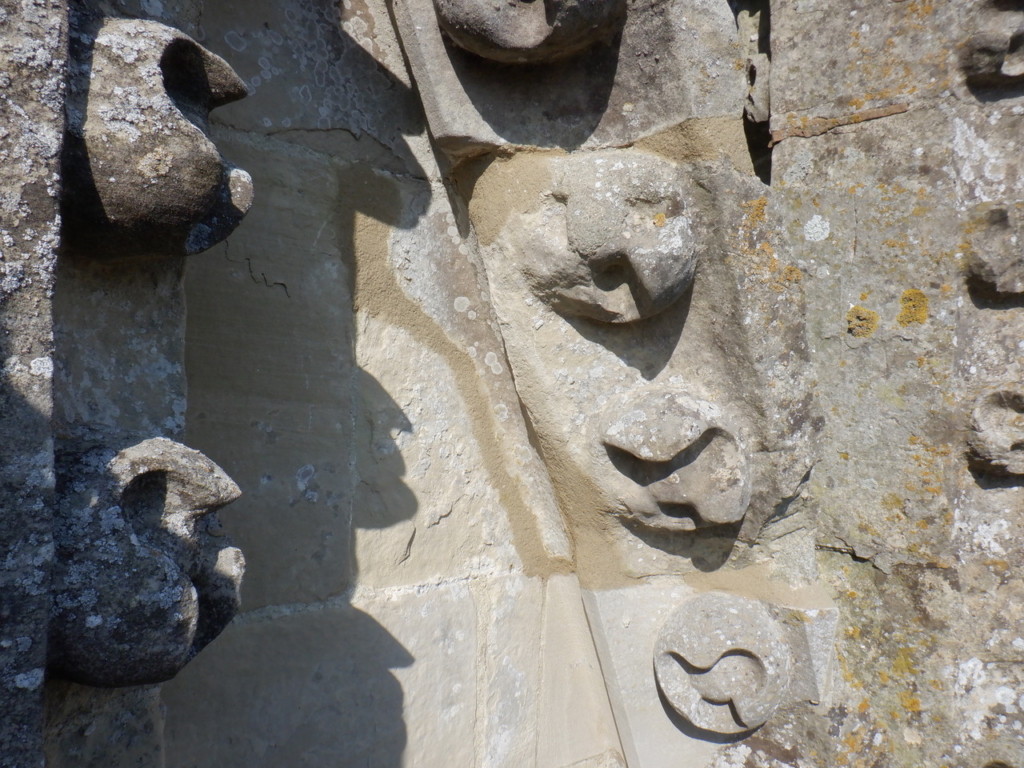
After stone repair
The search for the ‘perfect’ mortar
Over the years hundreds of repairs have been applied to the spire and to date only a small minority have been noted with this possibly detrimental effect. However, at each visit there are significantly fewer defects showing that the repair strategy is working.
The nature of this ongoing repair programme highlights the complex nature of conservation in an extreme environment. It also highlights the need for continued observation to best adapt the mortars to suit each specific situation. The search for the ‘perfect’ mortar continues.
With thanks to the Architects and Clerk of works who have facilitated the works.
Become a member
Members of the Building Limes Forum form a community of lime enthusiasts and practitioners, most of whom are producers, suppliers, specifiers or users of lime.
Useful documents
Contact Building Limes Forum
Building Limes Forum
Riddle’s Court
322 Lawnmarket
Edinburgh, EH1 2PG, UK


